(→Trivia) Tag: rte-source |
No edit summary |
||
| (25 intermediate revisions by 3 users not shown) | |||
| Line 3: | Line 3: | ||
| image = [[File:wrench.jpg|275px]] |
| image = [[File:wrench.jpg|275px]] |
||
| obtained = [[MedSci Deck]] |
| obtained = [[MedSci Deck]] |
||
| − | | attack = |
+ | | attack = Normal<br>Overhand <small><nowiki>[with </nowiki>[[Smasher]]<nowiki>]</nowiki></small> |
| − | | damage = |
+ | | damage = 6 <small>(Normal)</small><br>9 <small><nowiki>(Overhand) [with </nowiki>[[Smasher]]<nowiki>]</nowiki></small> |
| − | | summon = |
+ | | summon = wrench |
| − | }}{{quote|When you hit someone over the head with 22 pounds of steel, they tend not to appreciate it.|[[Taz Amanpour]], [[Von Braun]] Maintenance Crew}} |
+ | |requirements = −|research = No}}{{quote|When you hit someone over the head with 22 pounds of steel, they tend not to appreciate it.|[[Taz Amanpour]], ''[[Von Braun]]'' Maintenance Crew}} |
| − | The '''Wrench''' is the first weapon to be found in ''[[System Shock 2]]'' |
+ | The '''Wrench''' is the first weapon to be found in ''[[System Shock 2]]'' and one of the four melee weapons in the game (counting in the [[Cerebro-Energetic Extension|Psi-Sword]]). It is first found on the body of a deceased maintenance worker near the starting point of the game and, soon afterwards, near the first encountered [[Energy Recharging Station]]. |
| − | It is a standard maintenance wrench, with blood (or rust) stained on the silver pegs on the top. This points out that whoever was using this wrench, was using it as a weapon/tool |
+ | It is a standard maintenance wrench, with blood (or rust) stained on the silver pegs on the top. This points out that whoever was using this wrench, was using it as a weapon/tool. |
| + | |||
| + | Being a melee weapon, it requires no ammunition, cannot decay, and cannot be modified. |
||
==Requirements== |
==Requirements== |
||
| − | The Wrench does not |
+ | The Wrench does not have any requirements. |
| + | |||
| + | <br> |
||
==Damage Table== |
==Damage Table== |
||
| − | {|border="1" cellspacing="0" cellpadding="2" width=100% |
+ | {| border="1" cellspacing="0" cellpadding="2" width="100%" |
| − | |bgcolor=#003300 align=center| |
+ | | bgcolor="#003300" align="center" | |
| − | |bgcolor=#003300 align=center|'''Annelid''' |
+ | | bgcolor="#003300" align="center" |'''Annelid''' |
| − | |bgcolor=#003300 align=center|'''Half-Annelid''' |
+ | | bgcolor="#003300" align="center" |'''Half-Annelid''' |
| − | |bgcolor=#003300 align=center|'''Mech''' |
+ | | bgcolor="#003300" align="center" |'''Mech''' |
| − | |bgcolor=#003300 align=center|'''Half-Mech''' |
+ | | bgcolor="#003300" align="center" |'''Half-Mech''' |
| − | |bgcolor=#003300 align=center|''' |
+ | | bgcolor="#003300" align="center" |'''Final Boss''' |
| − | |bgcolor=#003300 align=center|'''Final Boss''' |
||
|- |
|- |
||
| − | |align=center bgcolor=#003300|'''Weapon Bash''' |
+ | | align="center" bgcolor="#003300" |'''Weapon Bash''' |
| − | |align=center|x1 |
+ | | align="center" |x1 |
| − | |align=center|x1 |
+ | | align="center" |x1 |
| − | |align=center|x0.5 |
+ | | align="center" |x0.5 |
| − | |align=center|x1 |
+ | | align="center" |x1 |
| − | |align=center| |
+ | | align="center" |x0 |
| − | |align=center|x0 |
||
|} |
|} |
||
==Strategies== |
==Strategies== |
||
===General Melee Strategies=== |
===General Melee Strategies=== |
||
| − | *[[Strength]] |
+ | *[[Strength]] increases the final bonus added to the melee damage and thus should be a high priority. |
| − | *Both |
+ | *Both [[Lethal Weapon]] and [[Smasher]] [[O/S Upgrades]] (acquired preferably in that order) substantially increase the damage output of a melee weapon, and should come in handy throughout the whole game. |
| ⚫ | |||
| ⚫ | |||
| + | **[[Psycho-Reflective Screen|''Psycho-Reflective Screen'']]'' ''that protects against 15% of almost all damage'' ''([[O.S.A. Agent#Year One|Year 1]], Mission 3) |
||
| ⚫ | |||
| ⚫ | |||
| ⚫ | *Enemies with no melee attack at all, including |
||
| ⚫ | |||
| ⚫ | |||
| + | **[[Recursive Psionic Amplification]] that boosts PSI statistic, influencing all''' '''Psi Powers |
||
| ⚫ | |||
| + | **[[Psychogenic Strength]] that increases the final bonus to the melee damage |
||
| ⚫ | |||
| ⚫ | |||
| ⚫ | |||
| + | **[[Neural Decontamination|''Neural Decontamination'']]'' ''that efficiently protects against radiation, useful on [[Engineering Deck|Deck 1]] |
||
| ⚫ | |||
| ⚫ | |||
| ⚫ | |||
| ⚫ | *[[Shotgun Hybrid|Shotgun Hybrids]] are one of the tougher opponents on early stages, as they have hitscan weapons. It's hard to defeat them without taking any damage being already in their range. However, the player can hide, attack them from behind, and circle-strafe, buying enough time to finish them before they turn and start shooting. |
||
| ⚫ | |||
| + | **The other approach is to run away to avoid the explosion at just the right moment when they go into self-destruct. Going around corners is very useful. Lots of practice and high Agility are recommended. |
||
| ⚫ | *Enemies with no melee attack at all, including [[Maintenance Robot|all]] [[Security Robot|types]] [[Assault Robot|of]] big Robots, always prioritize getting some distance before attacking. That means as long as one stays very close to the enemy, it will keep walking back instead of attacking the player, giving enough time to defeat the foe. This strategy stops working efficiently when an enemy does not have enough space to flee. |
||
| ⚫ | |||
| + | *All big Robots have their only weapon mounted on '''their''' '''right side''', the other one being harmless. Approach them preferably from '''their''' '''left side''' using the above strategy to avoid their attacks. |
||
| + | **If they follow you, make sure to go clockwise. They can shoot at you even if only a part of their weapon protrudes around the corner, so going anticlockwise is discouraged. |
||
| + | *[[Turrets]] are best attacked at close quarters - that is, if they can be reached. Cutting the distance and circle-strafing around them doesn't give them a chance to fire at you. Moving fast in front of their line of sight makes them unable to lock the aim and shoot. |
||
| + | **With enough skill, the player can jump over a Turret to stand on top of them, thus being safe from their attack. |
||
| + | **[[Rickenbacker Turret|''Rickenbacker'' Turrets]] cannot hit if the player standing too close to them. |
||
| + | *[[Rumbler|Rumblers]] are essentially fast walking tanks and are to be treated as such - with ''extreme caution''. Learning their movement helps, but not entirely, as they can surprise the player with an almost instant attack. |
||
| + | *[[Grub|Grubs]], [[Blue Monkey|both]] [[Red Monkey|types]] of Monkeys and [[Infant Arachnid|Infant]] (to some extent also [[Adult Arachnid|both]] [[Invisible Arachnid|types]] of the bigger) Arachnids are most effectively attacked when crouching. It's best to retreat when attacking Grubs and Arachnids. On the contrary, it's recommended to charge while dealing with the Monkeys. |
||
| + | *Attacking the Eggs can be tricky because of their contents. Depending on their type, a different strategy has to be chosen: |
||
| + | **[[Black Egg|Black Eggs]] can be called sitting ducks, as they trigger no effects... ''yet''. |
||
| + | **[[Grub Egg|Grub Eggs]] are the least harmless. After the Grub hatches, the player should fall back to attack it. |
||
| + | **[[Swarm Egg|Swarm Eggs]] have a simple strategy: trigger and run. Afterwards they don't cause any problems. |
||
| + | **[[Toxic Egg]] are the toughest to deal with. While the flying spores can be easily dodged when crouching, the gas cloud will affect the player most of the time. Sometimes it can be avoided by approaching from above or from around a corner, but generally it's impossible to evade the toxic cloud. Melee-only players have to either stack [[Anti-Toxin Hypo|Anti-Toxin Hypos]], use [[Neural Toxin-Blocker|Psi Toxin Shield]], or be prepared for frequent visits at [[Quantum Bio-Reconstruction Machine|Resurrection Stations]]. |
||
| + | *Standing below [[Security Camera (SS2)|Security Cameras]] (if possible) eliminates their threat entirely. |
||
| + | *Moving (ideally circle-strafing) directly below [[Psi Reaver|Psi Reavers]] makes them unable to aim and shoot at the player. |
||
| + | *[[Swarm|Swarms]] cannot be harmed using any melee weapon. |
||
===Wrench Specific=== |
===Wrench Specific=== |
||
| − | * |
+ | *Wrench has no requirements, therefore should be the first main weapon for all character builds. |
| + | *Despite not having any requirements, the Wrench belongs to Standard Weapons. As such, its damage increases as they are upgraded. Each upgrade gives 15% damage bonus, up to a maximum of 90%. |
||
| − | **Although having no requirements, the damage of this weapon increases along with the Standard Weapon skill, and hence it is important to upgrade the skill if planning to use the Wrench frequently. When one's Standard Weapon skill level reaches 6, the Wrench will receive a bonus damage of 75%. |
||
| − | *With the Smasher |
+ | *With the Smasher O/S Upgrade, an overhand hit does more base damage than the [[10 Gauge Shotgun|Shotgun]], costing no ammo. |
| − | *If the player focuses on ranged weapons, it is recommended to keep the Wrench as a backup |
+ | *If the player focuses on ranged weapons, it is recommended to keep the Wrench as a backup, since it's too wasteful to consume ammo on [[Grub]]s, hatched Eggs, or even [[Security Camera (SS2)|Security Cameras]]. |
| − | *On the other hand, if one mainly uses melee weapons, |
+ | *On the other hand, if one mainly uses melee weapons, one should eventually replace the Wrench with either [[Mark IV Laser Rapier|Laser Rapier]], Psi Sword, or [[Crystal Shard]]. The Wrench is generally weak (and has a shorter hitting range than the Rapier and the Shard), making it ineffective on later levels. |
| − | *It deals half damage to fully mechanical |
+ | *It deals half damage to fully mechanical foes, so it's advised to obtain a Pistol and use [[Armor-Piercing Bullets]]. |
| − | *It deals ''no'' damage to the [[SHODAN|final boss]]. Normally, a |
+ | *It deals ''no'' damage to the [[SHODAN|final boss]]. Normally, a Wrench-only game requires at least a Pistol to complete it. |
| ⚫ | |||
==Trivia== |
==Trivia== |
||
| ⚫ | |||
| ⚫ | |||
| ⚫ | |||
---- |
---- |
||
{{SS2Weapons}} |
{{SS2Weapons}} |
||
Revision as of 17:18, 5 February 2020
| Wrench | |
|---|---|
| |
| Weapon Data | |
| First Found | MedSci Deck |
| Requirements | − |
| Researchable | No |
| Attack Types | Normal Overhand [with Smasher] |
| Damage | 6 (Normal) 9 (Overhand) [with Smasher] |
| Summon Code | wrench |
| [Source] | |
| “ | ” | |
~ Taz Amanpour, Von Braun Maintenance Crew
| ||
The Wrench is the first weapon to be found in System Shock 2 and one of the four melee weapons in the game (counting in the Psi-Sword). It is first found on the body of a deceased maintenance worker near the starting point of the game and, soon afterwards, near the first encountered Energy Recharging Station.
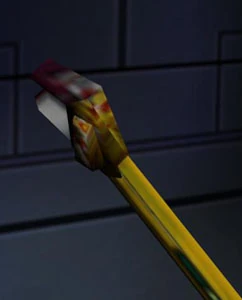
It is a standard maintenance wrench, with blood (or rust) stained on the silver pegs on the top. This points out that whoever was using this wrench, was using it as a weapon/tool.
Being a melee weapon, it requires no ammunition, cannot decay, and cannot be modified.
Requirements
The Wrench does not have any requirements.
Damage Table
| Annelid | Half-Annelid | Mech | Half-Mech | Final Boss | |
| Weapon Bash | x1 | x1 | x0.5 | x1 | x0 |
Strategies
General Melee Strategies
- Strength increases the final bonus added to the melee damage and thus should be a high priority.
- Both Lethal Weapon and Smasher O/S Upgrades (acquired preferably in that order) substantially increase the damage output of a melee weapon, and should come in handy throughout the whole game.
- Contrary to popular belief, O.S.A. Agent is arguably the best class to specialize in any melee weapon, as one can unlock the following Psionic Powers at the (very) beginning:
- Psycho-Reflective Screen that protects against 15% of almost all damage (Year 1, Mission 3)
- Psychogenic Agility which can be used to catch up with enemies on early maps (Year 3, Mission 1)
- Adrenaline Overproduction which can greatly increase melee damage (depending on one's PSI), allowing the player to literally smash any foe in one hit
- Recursive Psionic Amplification that boosts PSI statistic, influencing all Psi Powers
- Psychogenic Strength that increases the final bonus to the melee damage
- Localized Pyrokinesis which makes the player immune to the explosion of Protocol Droids (and also Laser and Blast Turrets), eliminating the greatest threat of any melee weapon user
- Neural Decontamination that efficiently protects against radiation, useful on Deck 1
- Observe the attack patterns of enemies and always try to evade when they are about to strike. Agility can make the job easier for obvious reasons. This is especially important in case of Pipe Hybrids and Cyborg Midwives.
- Shotgun Hybrids are one of the tougher opponents on early stages, as they have hitscan weapons. It's hard to defeat them without taking any damage being already in their range. However, the player can hide, attack them from behind, and circle-strafe, buying enough time to finish them before they turn and start shooting.
- Protocol Droids are very hard (close to impossible, actually) to defeat with melee weapons safely, therefore keeping a ranged weapon in one's inventory is advised.
- The other approach is to run away to avoid the explosion at just the right moment when they go into self-destruct. Going around corners is very useful. Lots of practice and high Agility are recommended.
- Enemies with no melee attack at all, including all types of big Robots, always prioritize getting some distance before attacking. That means as long as one stays very close to the enemy, it will keep walking back instead of attacking the player, giving enough time to defeat the foe. This strategy stops working efficiently when an enemy does not have enough space to flee.
- This strategy also applies to all types of Assassins, but they can fall back at a very high speed, easily putting the player in a tough situation.
- All big Robots have their only weapon mounted on their right side, the other one being harmless. Approach them preferably from their left side using the above strategy to avoid their attacks.
- If they follow you, make sure to go clockwise. They can shoot at you even if only a part of their weapon protrudes around the corner, so going anticlockwise is discouraged.
- Turrets are best attacked at close quarters - that is, if they can be reached. Cutting the distance and circle-strafing around them doesn't give them a chance to fire at you. Moving fast in front of their line of sight makes them unable to lock the aim and shoot.
- With enough skill, the player can jump over a Turret to stand on top of them, thus being safe from their attack.
- Rickenbacker Turrets cannot hit if the player standing too close to them.
- Rumblers are essentially fast walking tanks and are to be treated as such - with extreme caution. Learning their movement helps, but not entirely, as they can surprise the player with an almost instant attack.
- Grubs, both types of Monkeys and Infant (to some extent also both types of the bigger) Arachnids are most effectively attacked when crouching. It's best to retreat when attacking Grubs and Arachnids. On the contrary, it's recommended to charge while dealing with the Monkeys.
- Attacking the Eggs can be tricky because of their contents. Depending on their type, a different strategy has to be chosen:
- Black Eggs can be called sitting ducks, as they trigger no effects... yet.
- Grub Eggs are the least harmless. After the Grub hatches, the player should fall back to attack it.
- Swarm Eggs have a simple strategy: trigger and run. Afterwards they don't cause any problems.
- Toxic Egg are the toughest to deal with. While the flying spores can be easily dodged when crouching, the gas cloud will affect the player most of the time. Sometimes it can be avoided by approaching from above or from around a corner, but generally it's impossible to evade the toxic cloud. Melee-only players have to either stack Anti-Toxin Hypos, use Psi Toxin Shield, or be prepared for frequent visits at Resurrection Stations.
- Standing below Security Cameras (if possible) eliminates their threat entirely.
- Moving (ideally circle-strafing) directly below Psi Reavers makes them unable to aim and shoot at the player.
- Swarms cannot be harmed using any melee weapon.
Wrench Specific
- Wrench has no requirements, therefore should be the first main weapon for all character builds.
- Despite not having any requirements, the Wrench belongs to Standard Weapons. As such, its damage increases as they are upgraded. Each upgrade gives 15% damage bonus, up to a maximum of 90%.
- With the Smasher O/S Upgrade, an overhand hit does more base damage than the Shotgun, costing no ammo.
- If the player focuses on ranged weapons, it is recommended to keep the Wrench as a backup, since it's too wasteful to consume ammo on Grubs, hatched Eggs, or even Security Cameras.
- On the other hand, if one mainly uses melee weapons, one should eventually replace the Wrench with either Laser Rapier, Psi Sword, or Crystal Shard. The Wrench is generally weak (and has a shorter hitting range than the Rapier and the Shard), making it ineffective on later levels.
- It deals half damage to fully mechanical foes, so it's advised to obtain a Pistol and use Armor-Piercing Bullets.
- It deals no damage to the final boss. Normally, a Wrench-only game requires at least a Pistol to complete it.
- However, it's possible to finish the game using only the Wrench. One needs to use Speed Boosters to reach some Nerve Clusters and Brain Defense Nodes in the Body of the Many, and trick SHODAN Avatars into attacking SHODAN's Core in the final confrontation.
Trivia
- BioShock, which is described as the spiritual successor of System Shock 2, also features a Wrench as the first weapon, although it's a Pipe Wrench, as opposed to the Crescent Wrench in System Shock 2.