Tag: rollback |
(Centered all items in the table (could probably do it some easier way, but it works anyhow). Looking much better now...) Tag: Visual edit |
||
| (27 intermediate revisions by 3 users not shown) | |||
| Line 1: | Line 1: | ||
| − | [[File:SS2_Value_Rep.png|right|175px]][[File:Value_rep_render.png|right|175px]] |
+ | [[File:SS2_Value_Rep.png|right|175px]][[File:Value_rep_render.png|right|175px]] |
| + | |||
| − | The '''Value-Rep Nanite-Driven Replicator''' allows users to purchase useful items. [[SOLDIER G65434-2]] may find it useful to hack replicators, allowing for purchase of cheaper or more useful items. |
||
| + | {{Quote|Thank You for Choosing Value-Rep!|Replicator}} |
||
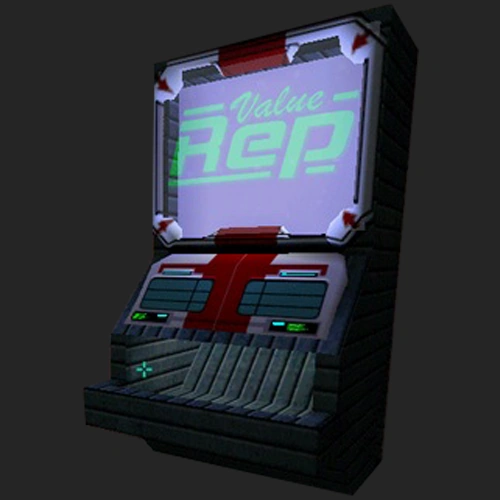
| + | '''Value-Rep Nanite-Based Matter Replicators''' allow purchase of various items using [[Nanites]]. These devices offer a wide variety of products, ranging from [[Chips|snacks]] to ammunition. |
||
| + | |||
| + | When interacted with, the Replicators show the price and the name of each available item. The current balance is shown at the bottom. Choosing the product you wish to buy subtracts a specific amount of Nanites from your account, replicates the object and drops it down the hopper, from which it can be picked up. |
||
| + | |||
| + | [[Hacking]] the Replicators lowers their prices and in most cases, allows the production of restricted, better-quality items than those normally available at a given machine. |
||
| − | Nanites may be spent at Value-Rep matter replication terminals on items ranging from snack foods to weapons. After the Replicator is activated, it indicates a description and a price (in nanites) for each item available. Select the item you wish to have replicated, then pick up the replicated item from the hopper below. Hacking the Replicators may allow production of restricted, cheaper, or better-quality items than are normally available at a given replicator. |
||
{{Clr}} |
{{Clr}} |
||
==Locations== |
==Locations== |
||
| − | {|class=wikitable cellpadding=5 style="width:100%;" |
+ | {| class="wikitable" cellpadding="5" style="width:100%;" |
| − | !colspan="5"|[[ |
+ | ! colspan="5" |[[Earth]] |
|- |
|- |
||
| + | |[[Ramsey Recruitment Center|Ramsey Center]]:<br>Technical Training |
||
| ⚫ | |||
| − | |style="font-size: 80%"|[[ |
+ | | style="font-size: 80%" align="center" |[[Chips]] |
| − | |style="font-size: 80%"|[[ |
+ | | style="font-size: 80%" align="center" |[[Juice]] |
| − | |style="font-size: 80%"|[[ |
+ | | style="font-size: 80%" align="center" |[[Standard Bullets]] |
| + | | align="center" |− |
||
| ⚫ | |||
|- |
|- |
||
| ⚫ | |||
| ⚫ | |||
| ⚫ | |||
| ⚫ | |||
| ⚫ | |||
| ⚫ | |||
|- |
|- |
||
| + | |[[XERXES 8933A/A|XERXES]]' Hub |
||
| ⚫ | |||
| − | |style="font-size: 80%"|[[ |
+ | | style="font-size: 80%" align="center" |[[Chips]] |
| − | |style="font-size: 80%"|[[ |
+ | | style="font-size: 80%" align="center" |12 [[Standard Bullets]] |
| − | |style="font-size: 80%"|[[ |
+ | | style="font-size: 80%" align="center" |6 [[Standard Bullets]] |
| − | |style="font-size: 80%"|[[ |
+ | | style="font-size: 80%" align="center" |[[Medical Hypo]] |
| ⚫ | |||
| ⚫ | |||
| ⚫ | |||
| ⚫ | |||
| ⚫ | |||
| ⚫ | |||
| ⚫ | |||
| ⚫ | |||
| ⚫ | |||
| − | |Xerxes |
||
| ⚫ | |||
| ⚫ | |||
| ⚫ | |||
| ⚫ | |||
|- |
|- |
||
|R+D |
|R+D |
||
| − | |style="font-size: 80%"|[[Chips]] |
+ | | style="font-size: 80%" align="center" |[[Chips]] |
| − | |style="font-size: 80%"|Standard Bullets |
+ | | style="font-size: 80%" align="center" |[[Standard Bullets]] |
| − | |style="font-size: 80%"|[[Psi Hypo]] |
+ | | style="font-size: 80%" align="center" |[[Psi Hypo]] |
| − | |style="font-size: 80%"|[[Anti-Toxin Hypo]] |
+ | | style="font-size: 80%" align="center" |[[Anti-Toxin Hypo]] |
|- |
|- |
||
|Lounge |
|Lounge |
||
| − | |style="font-size: 80%"|[[Juice]] |
+ | | style="font-size: 80%" align="center" |[[Juice]] |
| − | |style="font-size: 80%"|[[Disposable Maintenance Tool]] |
+ | | style="font-size: 80%" align="center" |[[Disposable Maintenance Tool]] |
| − | |style="font-size: 80%"|[[ |
+ | | style="font-size: 80%" align="center" |[[Hacking Software|Hacking Software v1]] |
| − | |style="font-size: 80%"|[[Anti-Radiation Hypo]] |
+ | | style="font-size: 80%" align="center" |[[Anti-Radiation Hypo]] |
|- |
|- |
||
|Lounge |
|Lounge |
||
| − | |style="font-size: 80%"|[[Cigarettes]] |
+ | | style="font-size: 80%" align="center" |[[Cigarettes]] |
| − | |style="font-size: 80%"|[[Fragmentation |
+ | | style="font-size: 80%" align="center" |[[Fragmentation Grenades]] |
| − | |style="font-size: 80%"|[[Psi Hypo]] |
+ | | style="font-size: 80%" align="center" |[[Psi Hypo]] |
| − | |style="font-size: 80%"|[[ |
+ | | style="font-size: 80%" align="center" |[[Rifled Slugs]] |
|- |
|- |
||
| − | !colspan="5"|[[ |
+ | ! colspan="5" |[[Engineering Deck]] |
| ⚫ | |||
| ⚫ | |||
| ⚫ | |||
| + | | style="font-size: 80%" align="center" |[[Fragmentation Grenades]] |
||
| ⚫ | |||
| ⚫ | |||
| ⚫ | |||
| ⚫ | |||
| ⚫ | |||
| ⚫ | |||
| ⚫ | |||
| + | | style="font-size: 80%" align="center" |[[Psi Hypo]] |
||
| ⚫ | |||
| ⚫ | |||
| ⚫ | |||
| + | | style="font-size: 80%" align="center" |[[Disposable Maintenance Tool]] |
||
| + | | style="font-size: 80%" align="center" |[[Rifled Slugs]] |
||
| + | | style="font-size: 80%" align="center" |[[Strength Booster]] |
||
| + | |- |
||
| ⚫ | |||
| ⚫ | |||
| ⚫ | |||
| ⚫ | |||
| ⚫ | |||
| + | |- |
||
| + | ! colspan="5" |[[Hydroponics Deck]] |
||
|- |
|- |
||
|Sector A |
|Sector A |
||
| − | |style="font-size: 80%"|[[Cigarettes]] |
+ | | style="font-size: 80%" align="center" |[[Cigarettes]] |
| − | |style="font-size: 80%"|[[Anti-Toxin Hypo]] |
+ | | style="font-size: 80%" align="center" |[[Anti-Toxin Hypo]] |
| − | |style="font-size: 80%"|Standard Bullets |
+ | | style="font-size: 80%" align="center" |[[Standard Bullets]] |
| − | |style="font-size: 80%"|[[ |
+ | | style="font-size: 80%" align="center" |[[Modification Software|Modification Software v1]] |
|- |
|- |
||
|Sector A |
|Sector A |
||
| − | |style="font-size: 80%"|[[Mug]] |
+ | | style="font-size: 80%" align="center" |[[Mug]] |
| − | |style="font-size: 80%"|[[Anti-Toxin Hypo]] |
+ | | style="font-size: 80%" align="center" |[[Anti-Toxin Hypo]] |
| − | |style="font-size: 80%"|[[Psi Hypo]] |
+ | | style="font-size: 80%" align="center" |[[Psi Hypo]] |
| − | |style="font-size: 80%"|[[Portable Battery]] |
+ | | style="font-size: 80%" align="center" |[[Portable Battery]] |
|- |
|- |
||
|Sector C |
|Sector C |
||
| − | |style="font-size: 80%"|[[Vodka]] |
+ | | style="font-size: 80%" align="center" |[[Vodka]] |
| − | |style="font-size: 80%"|[[Medical Hypo]] |
+ | | style="font-size: 80%" align="center" |[[Medical Hypo]] |
| − | |style="font-size: 80%"|[[ |
+ | | style="font-size: 80%" align="center" |[[Rifled Slugs]] |
| − | |style="font-size: 80%"|[[ |
+ | | style="font-size: 80%" align="center" |[[Repairing Software|Repairing Software v1]] |
|- |
|- |
||
|Sector D |
|Sector D |
||
| − | |style="font-size: 80%"|[[Cigarettes]] |
+ | | style="font-size: 80%" align="center" |[[Cigarettes]] |
| − | |style="font-size: 80%"|[[Fragmentation |
+ | | style="font-size: 80%" align="center" |[[Fragmentation Grenades]] |
| − | |style="font-size: 80%"|[[Disposable Maintenance Tool]] |
+ | | style="font-size: 80%" align="center" |[[Disposable Maintenance Tool]] |
| − | |style="font-size: 80%"|[[Psi Hypo]] |
+ | | style="font-size: 80%" align="center" |[[Psi Hypo]] |
|- |
|- |
||
|Bio Survey |
|Bio Survey |
||
| − | |colspan="4" |
+ | | colspan="4" align="center" |''Out of Service'' |
|- |
|- |
||
| − | !colspan="5"|[[Operations Deck]] |
+ | ! colspan="5" |[[Operations Deck]] |
|- |
|- |
||
|Mess |
|Mess |
||
| − | |style="font-size: 80%"|[[Mug]] |
+ | | style="font-size: 80%" align="center" |[[Mug]] |
| − | |style="font-size: 80%"|[[Psi Hypo]] |
+ | | style="font-size: 80%" align="center" |[[Psi Hypo]] |
| − | |style="font-size: 80%"|[[Strength Booster]] |
+ | | style="font-size: 80%" align="center" |[[Strength Booster]] |
| − | |style="font-size: 80%"|[[Medical Hypo]] |
+ | | style="font-size: 80%" align="center" |[[Medical Hypo]] |
|- |
|- |
||
|Mess |
|Mess |
||
| − | |style="font-size: 80%"|[[Vodka]] |
+ | | style="font-size: 80%" align="center" |[[Vodka]] |
| − | |style="font-size: 80%"|[[Disposable Maintenance Tool]] |
+ | | style="font-size: 80%" align="center" |[[Disposable Maintenance Tool]] |
| − | |style="font-size: 80%"|[[ |
+ | | style="font-size: 80%" align="center" |[[Anti-Personnel Shotgun Shells]] |
| − | |style="font-size: 80%" |
+ | | style="font-size: 80%" align="center" |[[Proximity Grenades]] |
|- |
|- |
||
|Crew Quarters |
|Crew Quarters |
||
| − | |style="font-size: 80%"|[[Cigarettes]] |
+ | | style="font-size: 80%" align="center" |[[Cigarettes]] |
| − | |style="font-size: 80%"|Armor-Piercing Bullets |
+ | | style="font-size: 80%" align="center" |[[Armor-Piercing Bullets]] |
| − | |style="font-size: 80%"|Standard Bullets |
+ | | style="font-size: 80%" align="center" |[[Standard Bullets]] |
| − | |style="font-size: 80%"|[[Fragmentation |
+ | | style="font-size: 80%" align="center" |[[Fragmentation Grenades]] |
|- |
|- |
||
|Barracks |
|Barracks |
||
| − | |style="font-size: 80%"|[[Cigarettes]] |
+ | | style="font-size: 80%" align="center" |[[Cigarettes]] |
| − | |style="font-size: 80%"|[[Juice]] |
+ | | style="font-size: 80%" align="center" |[[Juice]] |
| − | |style="font-size: 80%"|[[ |
+ | | style="font-size: 80%" align="center" |[[Rifled Slugs]] |
| − | |style="font-size: 80%"|[[Psi Hypo]] |
+ | | style="font-size: 80%" align="center" |[[Psi Hypo]] |
|- |
|- |
||
| − | !colspan="5"|[[Recreation Deck]] |
+ | ! colspan="5" |[[Recreation Deck]] |
|- |
|- |
||
|Dining |
|Dining |
||
| − | |style="font-size: 80%"|[[Chips]] |
+ | | style="font-size: 80%" align="center" |[[Chips]] |
| − | |style="font-size: 80%"|Armor-Piercing Bullets |
+ | | style="font-size: 80%" align="center" |[[Armor-Piercing Bullets]] |
| − | |style="font-size: 80%"|[[Anti-Toxin Hypo]] |
+ | | style="font-size: 80%" align="center" |[[Anti-Toxin Hypo]] |
| − | |style="font-size: 80%"|[[Psi Hypo]] |
+ | | style="font-size: 80%" align="center" |[[Psi Hypo]] |
|- |
|- |
||
| − | |Mall |
+ | |[[Mall]] |
| − | |style="font-size: 80%"|[[Cigarettes]] |
+ | | style="font-size: 80%" align="center" |[[Cigarettes]] |
| − | |style="font-size: 80%"|[[Fragmentation |
+ | | style="font-size: 80%" align="center" |[[Fragmentation Grenades]] |
| − | |style="font-size: 80%"|[[Medical Hypo]] |
+ | | style="font-size: 80%" align="center" |[[Medical Hypo]] |
| − | |style="font-size: 80%"|[[Psi Hypo]] |
+ | | style="font-size: 80%" align="center" |[[Psi Hypo]] |
|- |
|- |
||
|Mall |
|Mall |
||
| − | |style="font-size: 80%"|[[Soda]] |
+ | | style="font-size: 80%" align="center" |[[Soda]] |
| − | |style="font-size: 80%"|[[Disposable Maintenance Tool]] |
+ | | style="font-size: 80%" align="center" |[[Disposable Maintenance Tool]] |
| − | |style="font-size: 80%"|[[ |
+ | | style="font-size: 80%" align="center" |[[Prisms]] |
| − | |style="font-size: 80%"|[[Anti-Toxin Hypo]] |
+ | | style="font-size: 80%" align="center" |[[Anti-Toxin Hypo]] |
|- |
|- |
||
|Mall x 3 |
|Mall x 3 |
||
| − | |colspan="4" |
+ | | colspan="4" align="center" |''Out of Service'' |
|- |
|- |
||
|Theater |
|Theater |
||
| − | |style="font-size: 80%"|[[Chips]] |
+ | | style="font-size: 80%" align="center" |[[Chips]] |
| − | |style="font-size: 80%"|[[Cigarettes]] |
+ | | style="font-size: 80%" align="center" |[[Cigarettes]] |
| − | |style="font-size: 80%"|[[Soda]] |
+ | | style="font-size: 80%" align="center" |[[Soda]] |
| + | | align="center" |− |
||
|- |
|- |
||
| − | |Stim |
+ | |Sensual Stim Center |
| − | |style="font-size: 80%"|[[Stim Unit Access Card]] |
+ | | style="font-size: 80%" align="center" |[[Stim Unit Access Cards|Stim Unit Access Card]]: Nikki |
| − | |style="font-size: 80%"|[[Stim Unit Access Card]] |
+ | | style="font-size: 80%" align="center" |[[Stim Unit Access Cards|Stim Unit Access Card]]: Candy |
| − | |style="font-size: 80%"|[[Stim Unit Access Card]] |
+ | | style="font-size: 80%" align="center" |[[Stim Unit Access Cards|Stim Unit Access Card]]: Sven |
| − | |style="font-size: 80%"|[[Stim Unit Access Card]] |
+ | | style="font-size: 80%" align="center" |[[Stim Unit Access Cards|Stim Unit Access Card]]: Lance |
|- |
|- |
||
| − | |Athletics |
+ | |[[Athletic Sector|Athletics]] |
| − | |style="font-size: 80%"|[[Soda]] |
+ | | style="font-size: 80%" align="center" |[[Soda]] |
| − | |style="font-size: 80%"|Anti-Personnel |
+ | | style="font-size: 80%" align="center" |[[Anti-Personnel Bullets]] |
| − | |style="font-size: 80%"|[[Anti-Toxin Hypo]] |
+ | | style="font-size: 80%" align="center" |[[Anti-Toxin Hypo]] |
| − | |style="font-size: 80%"|[[ |
+ | | style="font-size: 80%" align="center" |[[Prisms]] |
|- |
|- |
||
| − | !colspan="5"|[[Command Deck]] |
+ | ! colspan="5" |[[Command Deck]] |
|- |
|- |
||
|Tram Station |
|Tram Station |
||
| − | |style="font-size: 80%"|[[Vodka]] |
+ | | style="font-size: 80%" align="center" |[[Vodka]] |
| − | |style="font-size: 80%"|[[Psi Hypo]] |
+ | | style="font-size: 80%" align="center" |[[Psi Hypo]] |
| − | |style="font-size: 80%"|[[Anti-Toxin Hypo]] |
+ | | style="font-size: 80%" align="center" |[[Anti-Toxin Hypo]] |
| − | |style="font-size: 80%"|Standard Bullets |
+ | | style="font-size: 80%" align="center" |[[Standard Bullets]] |
| + | |- |
||
| + | |Tram Station |
||
| + | | colspan="4" align="center" |''Out of Service'' |
||
|- |
|- |
||
|Med Station |
|Med Station |
||
| − | |style="font-size: 80%"|[[Vodka]] |
+ | | style="font-size: 80%" align="center" |[[Vodka]] |
| − | |style="font-size: 80%" |
+ | | style="font-size: 80%" align="center" |[[Proximity Grenades]] |
| − | |style="font-size: 80%"|[[Recycler]] |
+ | | style="font-size: 80%" align="center" |[[Recycler]] |
| − | |style="font-size: 80%"|[[ |
+ | | style="font-size: 80%" align="center" |[[Prisms]] |
|- |
|- |
||
|CEO Quarters |
|CEO Quarters |
||
| − | |style="font-size: 80%"|[[Vodka]] |
+ | | style="font-size: 80%" align="center" |[[Vodka]] |
| − | |style="font-size: 80%"|[[Psi Hypo]] |
+ | | style="font-size: 80%" align="center" |[[Psi Hypo]] |
| − | |style="font-size: 80%"|[[ |
+ | | style="font-size: 80%" align="center" |[[Anti-Personnel Shotgun Shells]] |
| − | |style="font-size: 80%"|[[ |
+ | | style="font-size: 80%" align="center" |[[Rifled Slugs]] |
|- |
|- |
||
|Shuttle Command |
|Shuttle Command |
||
| − | |style="font-size: 80%"|[[Vodka]] |
+ | | style="font-size: 80%" align="center" |[[Vodka]] |
| − | |style="font-size: 80%" |
+ | | style="font-size: 80%" align="center" |[[Incendiary Grenades]] |
| − | |style="font-size: 80%"|[[Fragmentation |
+ | | style="font-size: 80%" align="center" |[[Fragmentation Grenades]] |
| − | |style="font-size: 80%"|[[Disposable Maintenance Tool]] |
+ | | style="font-size: 80%" align="center" |[[Disposable Maintenance Tool]] |
| + | |- |
||
| + | ! colspan="5" |[[UNN Rickenbacker|''UNN Rickenbacker'']] |
||
| + | |- |
||
| + | |Nacelle B |
||
| + | | style="font-size: 80%" align="center" |[[Psi Hypo]] |
||
| ⚫ | |||
| ⚫ | |||
| + | | style="font-size: 80%" align="center" |[[Prisms]] |
||
| + | |- |
||
| + | |Path to Pod 2 |
||
| + | | style="font-size: 80%" align="center" |[[Vodka]] |
||
| + | | style="font-size: 80%" align="center" |[[Prisms]] |
||
| + | | style="font-size: 80%" align="center" |[[Anti-Toxin Hypo]] |
||
| + | | style="font-size: 80%" align="center" |[[ExperTech™]] [[Implant]] |
||
| + | |- |
||
| + | |''Rickenbacker'' Bridge |
||
| + | | style="font-size: 80%" align="center" |[[Juice]] |
||
| + | | style="font-size: 80%" align="center" |[[Disposable Maintenance Tool]] |
||
| + | | style="font-size: 80%" align="center" |[[Psi Hypo]] |
||
| + | | style="font-size: 80%" align="center" |[[EMP Grenades]] |
||
| + | |- |
||
| + | ! colspan="5" |[[Body of the Many]] |
||
| + | |- |
||
| + | |''Rickenbacker'' Room<br>(near entrance) |
||
| + | | style="font-size: 80%" align="center" |[[Juice]] |
||
| + | | style="font-size: 80%" align="center" |[[Anti-Toxin Hypo]] |
||
| + | | style="font-size: 80%" align="center" |[[Psi Hypo]] |
||
| + | | style="font-size: 80%" align="center" |[[Medical Kit]] |
||
| + | |- |
||
| + | |Flooded Room |
||
| + | | style="font-size: 80%" align="center" |[[Chips]] |
||
| + | | style="font-size: 80%" align="center" |[[Anti-Toxin Hypo]] |
||
| + | | style="font-size: 80%" align="center" |[[Anti-Personnel Shotgun Shells]] |
||
| + | | style="font-size: 80%" align="center" |[[Prisms]] |
||
|} |
|} |
||
| − | |||
[[File:SS2 Value Rep-1|center|335px]] |
[[File:SS2 Value Rep-1|center|335px]] |
||
| + | |||
| + | == Trivia == |
||
| + | *[[William Diego]] has a unique, wrist-mounted variant of the Replicator. |
||
==See Also== |
==See Also== |
||
| − | *[[Replicator Expert]] (O/S Upgrade) |
+ | *[[Replicator Expert]] ([[O/S Upgrades|O/S Upgrade]]) |
[[Category:Technology]] |
[[Category:Technology]] |
||
| + | [[Category:Environment]] |
||
Revision as of 03:42, 4 October 2019

| “ | ” | |
~ Replicator
| ||
Value-Rep Nanite-Based Matter Replicators allow purchase of various items using Nanites. These devices offer a wide variety of products, ranging from snacks to ammunition.
When interacted with, the Replicators show the price and the name of each available item. The current balance is shown at the bottom. Choosing the product you wish to buy subtracts a specific amount of Nanites from your account, replicates the object and drops it down the hopper, from which it can be picked up.
Hacking the Replicators lowers their prices and in most cases, allows the production of restricted, better-quality items than those normally available at a given machine.
Locations
Trivia
- William Diego has a unique, wrist-mounted variant of the Replicator.